

TL;DR:
- Virtual care involves four main stages: scheduling, preparation, the consultation itself, and follow-up actions to ensure effective treatment. Proper readiness, including technology testing, environment setup, and gathering health information, is essential for a positive experience. Being proactive and prepared maximizes the benefits of virtual visits and helps address limitations inherent to remote healthcare.
Virtual care has become one of the most convenient ways to get medical attention, yet the virtual care appointment workflow still trips people up. You log in late, your camera doesn’t work, or you realize mid-visit you can’t remember your medication names. These small missteps have a way of turning what should be a quick, stress-free visit into a frustrating experience. This guide walks you through every stage of the process, from scheduling to follow-up, so you can walk into your next virtual visit prepared, confident, and ready to get the care you need.
Table of Contents
- Key Takeaways
- Understanding the Virtual Care Appointment Workflow
- How to prepare for your virtual visit
- What to expect during the appointment
- After your appointment: follow-up and real limitations
- My honest take on virtual care preparation
- How Chameleonhc makes the workflow easier
- FAQ
Key Takeaways
| Point | Details |
|---|---|
| Know the full workflow | Virtual care has four distinct stages: scheduling, prep, the visit itself, and follow-up. |
| Prepare your tech early | Test your camera, mic, and internet connection 10 to 15 minutes before your appointment starts. |
| Environment matters | A quiet, well-lit space helps your provider assess you more accurately and improves visit quality. |
| Post-visit steps are critical | Follow-up scheduling, prescription pickup, and feedback submission are part of the workflow too. |
| Preparation closes the gap | Completing intake forms and gathering health data before your visit prevents the most common virtual care failure points. |
Understanding the Virtual Care Appointment Workflow
Most people assume a virtual appointment is just a regular doctor visit moved to a screen. It’s not quite that simple. Virtual care workflows require distinct processes adapted to remote delivery to keep you safe and get you effective care. The structure looks different from what you’d experience in a waiting room, and knowing each stage helps you get the most out of every visit.
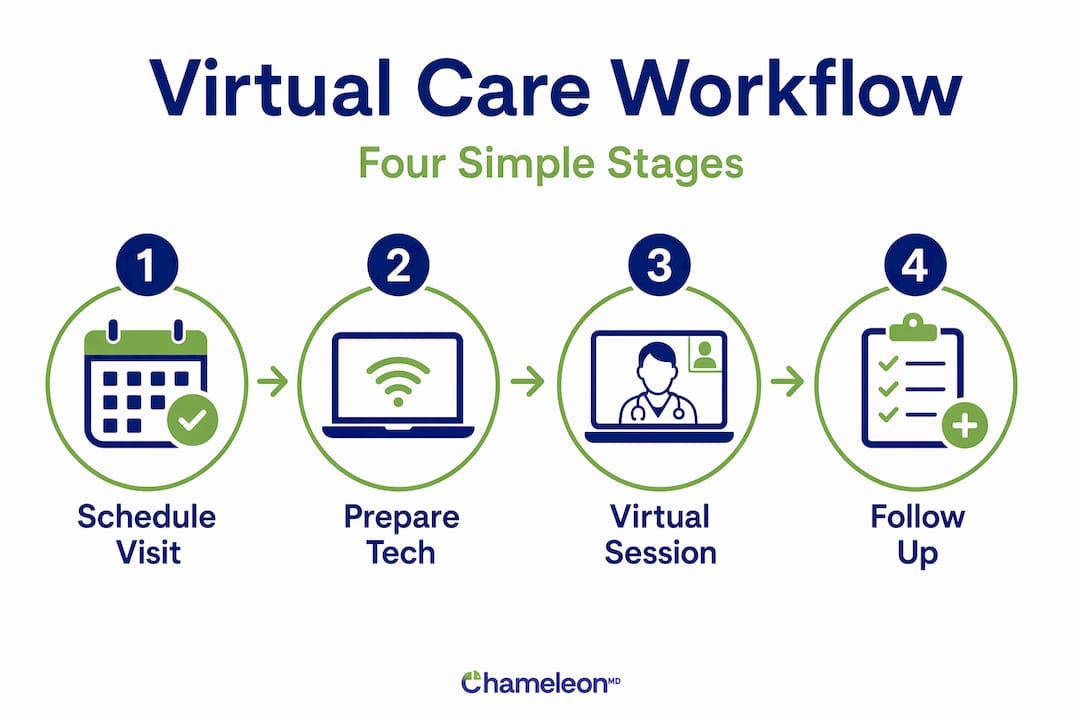
The four main stages of a virtual care appointment workflow are:
- Scheduling and intake: Choosing your provider, selecting a time, and completing pre-visit forms online
- Pre-visit preparation: Setting up your technology, gathering health information, and preparing your physical space
- The virtual visit: Identity verification, the consultation itself, and any real-time assessments
- Post-visit follow-up: Receiving your care summary, filling prescriptions, and scheduling any next steps
Here’s how that compares to a traditional in-person visit:
| Stage | In-person visit | Virtual care visit |
|---|---|---|
| Scheduling | Phone call or walk-in | Online portal or app |
| Check-in | Front desk, paperwork | Digital intake forms before visit |
| Wait time | Physical waiting room | Log in from home |
| Exam | Physical hands-on assessment | Visual and conversational assessment |
| Checkout | Front desk confirmation | Digital summary and follow-up instructions |
| Prescription | Printed or called in | Sent electronically to your pharmacy |
One key difference to understand: virtual care skips the physical exam. Your provider relies heavily on what you describe and what they can see on screen. That makes your preparation and communication more important than ever.
How to prepare for your virtual visit
Preparation is where most people either win or lose the virtual care experience. The pre-visit gap — patients arriving unprepared or running into tech problems — is the leading failure point in virtual visits. The good news is that it’s almost entirely preventable.
Technology setup
Start with your device and connection. You’ll need a smartphone, tablet, or computer with a working camera and microphone. Check that your browser or the telehealth app has permission to access both. Many people don’t realize that camera and microphone access is often blocked by default, which can cause delays or even a canceled visit.
Testing your setup 10 to 15 minutes before your appointment avoids connection and permission issues that would otherwise eat into your appointment time.
Pro Tip: Do a mock video call with a friend or family member the day before a major virtual appointment. It’s the fastest way to catch audio and video problems before they matter.
Your environment
Treat your space the way a clinical environment treats a patient room. Successful virtual care users use headphones, good lighting, and a quiet location to help providers visually assess symptoms and improve the overall appointment quality. Natural light facing your face works best. A cluttered or dark background isn’t a dealbreaker, but a calm, well-lit setting genuinely helps your provider do their job.
Health information to gather
- Your current medications and dosages (have the actual bottles nearby if you can)
- A list of your symptoms, including when they started and how they’ve changed
- Any recent measurements like blood pressure readings or weight if relevant to your visit
- Your medical history or any recent test results you’ve received
If you’re managing a chronic condition, note that providers may need 7 to 14 days of home-monitored data before making safe medication adjustments remotely. Gathering that data ahead of time keeps your care on track.
Complete your intake forms early
Most telehealth platforms send intake forms before your appointment. Fill these out as soon as you receive them. Automated reminders reduce no-show rates by up to 40%, and part of what makes those reminders effective is prompting patients to complete their pre-visit steps. Treat each reminder as a checklist item, not just a calendar ping.

You can also review some practical scheduling tips before you book to make the remote care scheduling process even smoother.
What to expect during the appointment
Knowing what happens inside the visit itself helps you show up as an active participant rather than a passive one. Here’s the general flow of most virtual healthcare workflow sessions:
- Identity verification: Your provider will confirm your name, date of birth, and reason for the visit. This is a required step that differs from in-person care, where your chart is already pulled at check-in.
- Symptom discussion: Your provider will ask you to describe what you’re experiencing. Be specific: location, severity on a scale of 1 to 10, duration, and any factors that make it better or worse.
- Visual assessment: Providers can assess a surprising amount through a camera, including skin conditions, eye redness, visible swelling, and how you move. Good lighting helps them see what they need to see.
- Questions and care plan: Your provider will discuss possible diagnoses and next steps. This is your time to ask questions. Don’t hold back.
- Wrap-up: You’ll receive instructions verbally and usually in a follow-up message or portal summary.
Appointment length varies more in virtual care than it does in person. A quick consultation for something like a sinus infection may take 10 to 15 minutes. Initial psychiatric evaluations can last up to 75 minutes to cover your full history and complete a proper assessment.
Some platforms are now using AI-powered patient assistants to help you organize and communicate your health concerns more clearly before or during visits. These tools ask structured questions that guide you through your symptoms in a way that’s easy for both you and your provider to follow.
Pro Tip: Keep your medication list and a notepad next to you during the call. Writing down the provider’s instructions in real time prevents confusion when the visit ends and you’re trying to remember what was said.
If you experience a technical issue mid-visit, stay calm. Mute yourself, check your connection, and rejoin the session. Most providers expect the occasional glitch and will wait or reconnect with you.
After your appointment: follow-up and real limitations
The virtual care appointment workflow doesn’t end when the call does. What you do next matters just as much as the visit itself. Virtual workflows require distinct consent, identity verification, and follow-up confirmation steps, since there’s no physical checkout process to catch loose ends.
Here’s what the post-visit phase typically includes:
- Reviewing your care summary in the patient portal
- Picking up or verifying any electronic prescriptions at your pharmacy
- Scheduling a follow-up visit if your provider recommended one
- Submitting feedback through the platform if you experienced any issues
It’s also worth being honest with yourself about what virtual care can and can’t do. Some situations genuinely require an in-person visit.
| Common challenge | Practical solution |
|---|---|
| Conditions needing physical exam | Ask your provider if in-person referral is needed |
| Technology access issues | Use a public library computer or ask a family member for help |
| Communication barriers (language, hearing) | Request interpreter services or caption tools from the platform |
| Prescription delays | Confirm pharmacy details at the end of your visit |
| Feeling uncertain about diagnosis | Request a follow-up or seek a second opinion |
If your provider can’t safely assess or treat your condition through a screen, a good telehealth service will tell you directly. That honesty is a feature, not a flaw. For conditions like family health concerns, virtual care is often the faster and more practical option when the situation is appropriate.
My honest take on virtual care preparation
From everything I’ve seen in how patients engage with virtual care, the biggest mistake isn’t a technology problem. It’s a mindset one. People treat virtual appointments like they’re less serious than in-person visits, and that attitude quietly undermines the experience before the call even starts.
In my experience, the patients who get the most out of virtual care treat it with the same level of intention they’d bring to walking into a clinic. They prepare their notes, they show up early, and they ask their questions out loud rather than hoping the provider brings it up. That shift alone changes the quality of the conversation and the care they receive.
I’ve also learned that the pre-visit gap is real and underestimated. Most failed or frustrating virtual visits trace back to something that could have been prevented in the 15 minutes before the appointment. The workflow itself is solid when patients engage with it fully.
What I’d tell anyone new to this: virtual care isn’t a lesser option. When you use it well, it’s one of the most efficient and patient-centered ways to get care. Technology will keep improving, and AI tools will make articulating your symptoms even easier. But the foundation will always be preparation and honest communication. No app replaces that.
— Vector
How Chameleonhc makes the workflow easier
One of the biggest sources of friction in the virtual care appointment workflow is figuring out where to start and what it will cost. Chameleonhc removes both of those barriers. With same-day access to licensed providers and transparent pricing that requires no insurance, you can book a virtual visit and know exactly what you’re paying before the call starts.
Chameleonhc’s telehealth subscription plans are built to take the guesswork out of remote care scheduling. Whether you’re dealing with a sore throat, a rash, or a sinus infection, the platform connects you with a provider quickly, handles your intake digitally, and sends your care summary and any prescriptions directly after your visit. If you want care that fits into real life without the waiting room or the billing surprises, this is where to start.
FAQ
What are the main steps in a virtual care appointment workflow?
The workflow has four stages: scheduling your visit online, preparing your technology and health information, attending the virtual consultation, and completing post-visit follow-up steps like prescription pickup and any recommended next appointments.
How early should I test my technology before a virtual appointment?
Test your camera, microphone, and internet connection at least 10 to 15 minutes before your appointment starts, since browser permissions for camera and mic access are often blocked by default and require user action to fix.
What are the biggest challenges with virtual care appointments?
The most common challenges include technology access issues, limited physical examination capability, and arriving unprepared. Most of these can be addressed by completing intake forms early, testing your setup in advance, and having your health information ready.
Can all medical conditions be treated through virtual care?
No. Virtual care works well for many common conditions like infections, rashes, and minor injuries, but some situations require a hands-on physical exam. A good telehealth provider will let you know when an in-person visit is the safer choice.
How do I get a prescription after a virtual care appointment?
Your provider sends the prescription electronically to the pharmacy of your choice. Confirm your preferred pharmacy at the end of your visit to avoid delays, and check your patient portal for your care summary shortly after the appointment ends.